By: Julie Goldstein
This week up in The Studio, we went on another nature adventure. This time we learned all about “Textures” in nature. First, the children passed around a pinecone and used their own words to describe how it felt in the palm of their hands. Some said, “it’s squishy” and other “it’s soft” or “prickly”. Then we took a box of oil pastels and white construction paper out to The Glenn and filled up the paper with rubbings of all kinds of objects that they found in nature. Follow this fun lesson to see how to change the rubbings into works of art!

Materials:
- oil pastels or crayons
- white construction paper
- glue
- scissors
- colored construction or true-ray paper
Instructions:
- Discuss the word “texture” and describe what it means. For most children, this is the first time that they are learning about textures, especially in nature. “Does anybody know the word that we use to describe the way objects feel when you touch them?” “What does your hair feel like?” “What does your shirt feel like?” Enforce a variety of words to help describe the items.
- Show them a pinecone or object found in nature. Have the children pass the object around the table. Each child will have an opportunity to describe what the pinecone feels like. For the younger children, I offer 2 different words to choose from. “Does the pinecone feel soft or hard? Bumpy or smooth?”
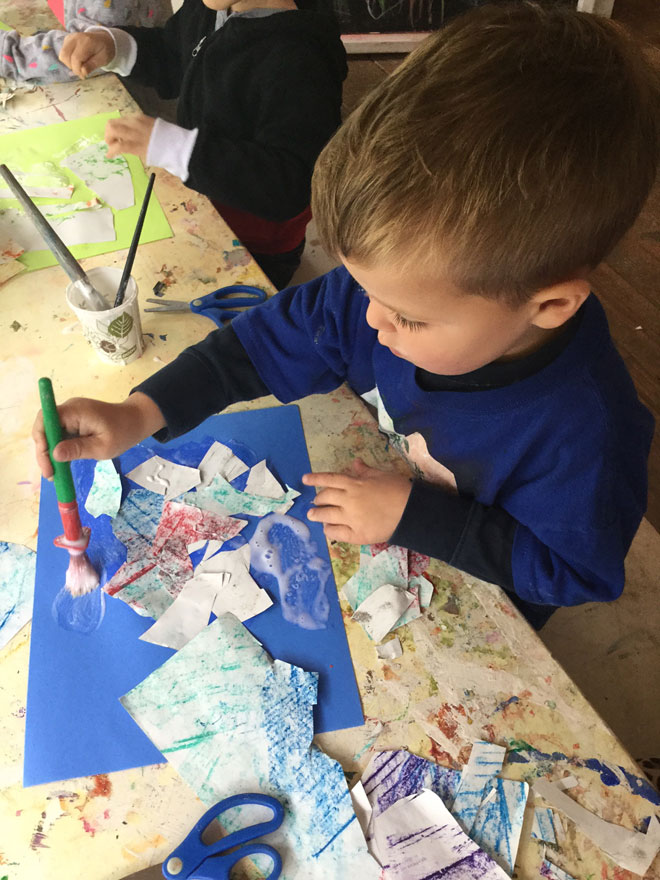
- Then demonstrate using an oil pastel and paper to rub over the pinecone and show them all of the textures.
- Walk out into nature (or around your house or classroom) and find a variety of objects that have different kinds of textures and fill up the entire page with colors after rubbing rocks, tree trunks, leaves, sidewalks, and fences…
- Go back to the worktable. If the children are under 3, I have them tear the paper to create shapes. If the children are older than 3, we use scissors. Demonstrate big shapes, small shapes, and long shapes, short shapes.
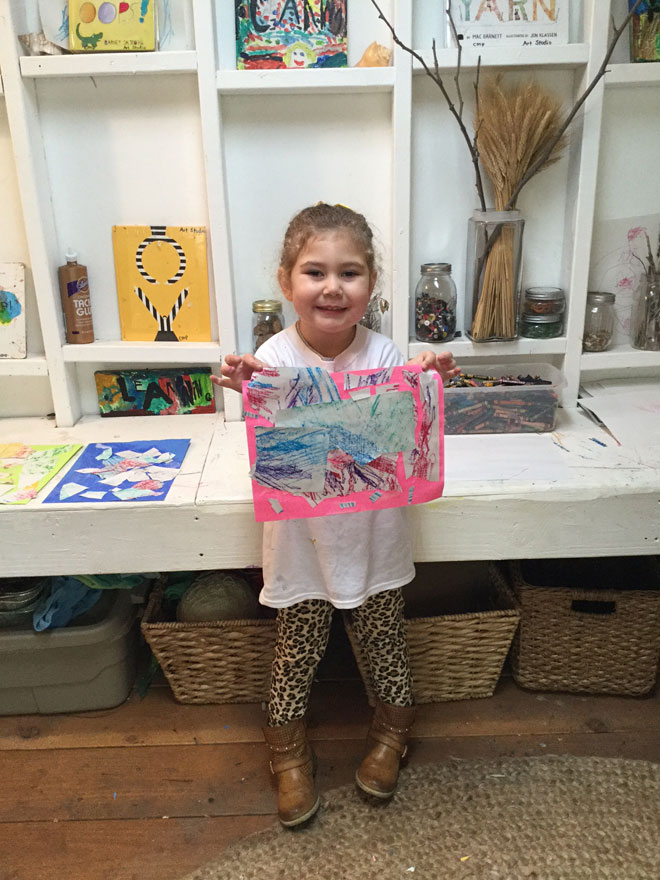
- Glue down the new shapes to create a collage onto bright colored paper. (Often children older than 4, will created representational pieces of art portraying animals, family, robots and cars).

*For children 2 and under, I used corrugated cardboard as the textured surface. They did this around a table and loved seeing how the lines showed up after rubbing over the bumpy surface.
This is fun and easy project to do at home and a great way to teach children all about “Textures in Nature”.
Have Fun!